Lalyan Cosmetic Core
PluginLalyan Cosmetic Core is an API for Hytale that allows players to equip and customize cosmetic items without occupying armor slots.
<span style="color:#843fa1">English</span>
<span style="color:#b96ad9">Lalyan Cosmetic Core</span>
An API to register and customize cosmetics without using armor slots
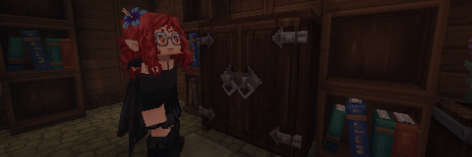
Custom Wardrobe model and texture are made by EtherealShigure.
<span style="color:#3598db">Introduction</span>
This plugin allows players to customize which cosmetic they have equipped, without having to use up their armor slots
It also allows plugin makers to create their custom cosmetics, without needing any java code!
The plugin features a custom GUI to customize cosmetics, which can be opened by command or, in a more immersive way, by crafting the Cosmetic Wardrobe
The Cosmetic Wardrobe can be crafted in the Builder's Workbench using 4 of any Hardwood
The GUI provides an easy way to select cosmetics and cosmetic variants. Left-click on a cosmetic to equip it, if the cosmetic has the variant icon, right-click it to open the variant menu!
<span style="color:#3598db">Commands</span>
The plugin has some commands that are mainly for testing purposes:
/cosmetic apply <CosmeticId> [override]manually applies a certain cosmetic defined byCosmeticId,overrideis optional, default isyes [other value is no], determines whether all other cosmetics of its type should be removed. Requires OP
/cosmetic changemanually opens the Cosmetic Customization UI. Does not require permissions
/cosmetic listprints in chat all loaded cosmetic ids. Requires OP
/cosmetic reloadmanually reloads all cosmetics. Requires OP
/cosmetic clearremoves all custom cosmetics and resets the default skin. Requires OP
<span style="color:#3598db">Registering cosmetics</span>
<span style="color:#e03e2d">!Warning! Remember that the name you give to the files is important!</span>
Registering a cosmetic is quite simple. You'll need to make an asset pack (obviously), and will need 3 files:
- The cosmetic's .blockymodel
- The cosmetic's .png texture
- The cosmetic's .png icon, which is the same icon you would use for the item!
These files must be named in the same way, that being CustomID.extension
Each cosmetic will be its own folder, with this structure
CustomID/
├── CustomID.blockymodel
├── CustomID.png
└── Icon/
    └── CustomID.png
Then the cosmetic will go in a certain folder, depending on the type:
<span style="color:#236fa1">Cosmetics</span>
(things like shirts, caps, pants etc..)
The base path for cosmetics is Common/Resources/Cosmetics, then the folder based on the slot, which can be:
CapesEars_AccessoriesGlovesHeadFace_AccessoriesOverpantsOvertopsPantsShoesUndertopsUnderwears
Then the folder you made before.
So, for a cosmetic called Custom\_Cape, which is in the cape slot it would be like this:
Common/Resources/Cosmetics/Capes/Custom_Cape and inside the Custom\_Cape folder:
Custom_Cape/
├── Custom_Cape.blockymodel
├── Custom_Cape.png
└── Icon/
    └── Custom_Cape.png
<span style="color:#236fa1">Characters</span>
(things like mouth, ears, eyes etc..)
The base path for character cosmetics is Common/Resources/Characters, then the folder based on the slot, which can be:
BeardsEarsEyebrowsEyesFacesMouthHaircutsHair_ExtensionWingsTailsHornsFace_Details
Then the folder you made before.
So, for a character cosmetic called Custom\_Eyes, which is in the cape slot it would be like this:
Common/Resources/Cosmetics/Capes/Custom_Eyes and inside the Custom\_Eyes folder:
Custom_Eyes/
├── Custom_Eyes.blockymodel
├── Custom_Eyes.png
└── Icon/
    └── Custom_Eyes.png
The Hair\_Extension slot automatically takes the same gradient as the Hairstyle.
<span style="color:#169179">Read full documentation at <a href="https://goodwitchlalya.github.io/Lalyan-Documentation/en/mod/lalyan-cosmetic-core/" target="_blank" rel="nofollow"><span style="color:#3598db">LCCDocumentationLink</span></a></span>
Or if it doesn't work <span style="color:#34495e">AltLink</span>
<span style="color:#843fa1">Italiano</span>
<span style="color:#b96ad9">Lalyan Cosmetic Core</span>
Un'API per registrare e personalizzare cosmetici senza usare gli slot dell'armatura
Modello e texture del Custom Wardrobe sono fatti da EtherealShigure.
<span style="color:#3598db">Introduzione</span>
Questo plugin permette ai giocatori di personalizzare quale cosmetico hanno equipaggiato, senza dover usare i loro slot dell'armatura
Permette anche ai creatori di plugin di creare i loro cosmetici personalizzati, senza aver bisogno di alcun codice Java!
Il plugin fornisce una GUI per personalizzare i cosmetici, che può essere aperta tramite comando o, in un modo più immersivo, interagendo con il Guardaroba Cosmetico
Il Guardaroba Cosmetico può essere craftato in una Builder's Workbench con 4 di qualsiasi Hardwood
La GUI fornisce un modo semplice per selezionare cosmetici e varianti di cosmetici. Fai clic con il pulsante sinistro su un cosmetico per equipaggiarlo, se il cosmetico ha l'icona della variante, fai clic con il pulsante destro per aprire il menu delle varianti!
<span style="color:#3598db">Comandi</span>
Il plugin ha alcuni comandi che sono principalmente a scopo di test:
/cosmetic apply <CosmeticId> [override]applica manualmente un certo cosmetico definito daCosmeticId,overrideè opzionale, il valore predefinito èyes [l'altro valore è no], determina se tutti gli altri cosmetici del suo tipo devono essere rimossi. Richiede OP
/cosmetic changeapre manualmente l'interfaccia utente di personalizzazione dei cosmetici. Non richiede permessi
/cosmetic liststampa in chat tutti gli ID dei cosmetici caricati. Richiede OP
/cosmetic reloadricarica manualmente tutti i cosmetici. Richiede OP
/cosmetic clearrimuove tutti i cosmetici personalizzati e ripristina la skin predefinita. Richiede OP
<span style="color:#3598db">Registrazione dei cosmetici</span>
<span style="color:#e03e2d">!Attenzione! Ricordati che il nome che dai ad i files è importante!</span>
Registrare un cosmetico è abbastanza semplice. Dovrai creare un pacchetto di risorse (ovviamente), e avrai bisogno di 3 file essenziali:
- Il file .blockymodel del cosmetico
- La texture .png del cosmetico
- L'icona .png del cosmetico, che è la stessa icona che useresti per l'oggetto!
Questi file devono essere nominati allo stesso modo, ovvero CustomID.extension
Ogni cosmetico avrà la sua cartella, con questa struttura
CustomID/
├── CustomID.blockymodel
├── CustomID.png
└── Icon/
    └── CustomID.png
La cartella del cosmetico andrà messa all'interno di una certa cartella, a seconda del tipo di cosmetico:
<span style="color:#236fa1">Cosmetici</span>
(cose come magliette, cappelli, pantaloni ecc..)
Il percorso base per i cosmetici è Common/Resources/Cosmetics, seguito dalla cartella basata sullo slot, che può essere:
CapesEars_AccessoriesFace_AccessoriesGlovesHeadOverpantsOvertopsPantsShoesUndertopsUnderwears
Scegli quale di questi slots deve occupare il tuo cosmetico e inserisci la cartella che hai creato prima.
Quindi, per un cosmetico chiamato Custom_Cape, che si trova nello slot Capes, il percorso sarà questo:
Common/Resources/Cosmetics/Capes/Custom_Cape, e all'interno della cartella Custom_Cape:
Custom_Cape/
├── Custom_Cape.blockymodel
├── Custom_Cape.png
└── Icon/
    └── Custom_Cape.png
<span style="color:#236fa1">Parti del Personaggio</span>
(cose come bocca, orecchie, occhi ecc..)
Il percorso base per i cosmetici del personaggio è Common/Resources/Characters, seguito dalla cartella basata sullo slot, che può essere:
BeardsEarsEyebrowsEyesFacesMouthHaircutsHair_ExtensionWingsTailsHornsFace_Details
Scegli quale di questi slots deve occupare la tua parte per il personaggio e inserisci la cartella che hai creato prima.
Quindi, per un cosmetico del personaggio chiamato Custom_Eyes, che si trova nello slot Eyes, il percorso sarà questo:
Common/Resources/Characters/Eyes/Custom_Eyes, e all'interno della cartella Custom_Eyes:
Custom_Eyes/
├── Custom_Eyes.blockymodel
├── Custom_Eyes.png
└── Icon/
    └── Custom_Eyes.png
Lo slot Hair\_Extension prende automaticamente il gradiente del'acconciatura.
<span style="color:#169179">Leggi la documentazione completa su <a href="https://goodwitchlalya.github.io/Lalyan-Documentation/it/mod/lalyan-cosmetic-core/" target="_blank" rel="nofollow"><span style="color:#3598db">LinkDocumentazioneLCC</span></a></span>
Oppure se non funziona prova <span style="color:#34495e">AltLink</span>
0 Comments